If you’re passionate about collecting mugs, you understand that these small ceramic items are much more than mere containers for beverages—they are artistic masterpieces. Similar to how fine artworks should be admired, your mugs also warrant being exhibited rather than stored inside cabinets. To highlight your assortment, there’s no requirement to purchase anything additional. Simply keep your leftover wood scraps and construct a homemade shelf that will effectively exhibit your cherished collection.
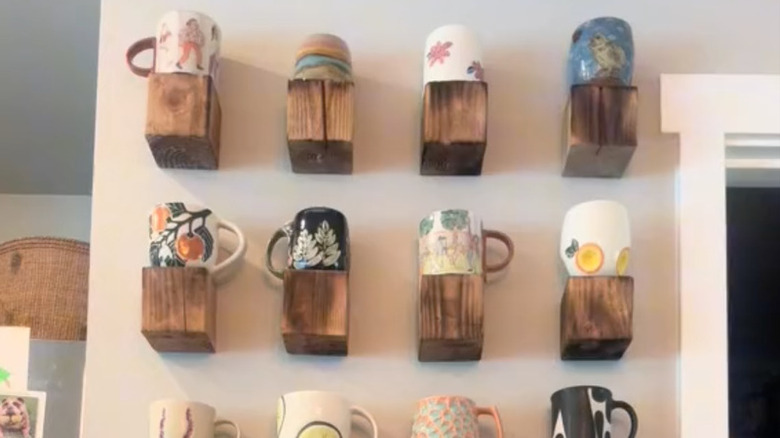
Let your eclectic assortment of mugs take center stage in your kitchen.
For this project, you will require pieces of reclaimed wood, a table saw equipped with a groove-cutting blade or a keyway router bit, along with screws and drywall anchors. Additionally, ensure you have at least one wooden block for every mug and double the number of screws compared to the blocks.
When selecting the type of wood, consider using what you already possess. Regardless of whether your intention is
convert an aged tree branch into a playful setup for holding coffee cups
, or you might have some leftover wooden planks from a recent remodeling job; both options would suffice. Just keep in mind that your wood sections should align perfectly with the wall surface and be sturdy enough to hold the weight of a coffee mug.
Read more:
The Item That Transforms Glass Yogurt Containers Into Cute Storage Solutions
You Only Require A Handful Of Tools To Construct A Wooden Mug Rack
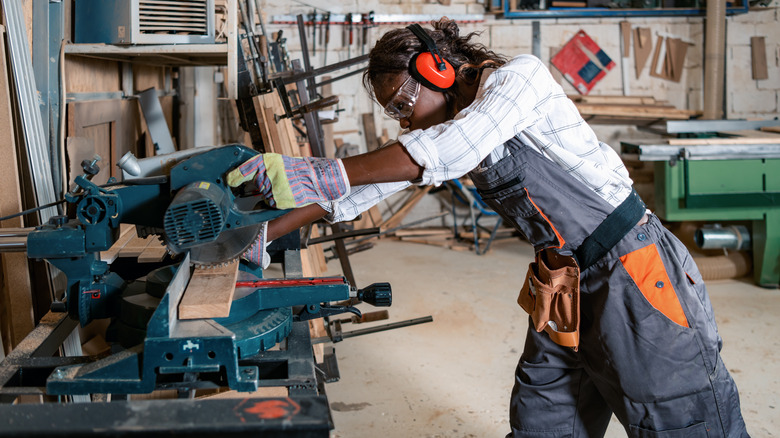
To get started, take your wooden blocks and table saw with a groove blade and cut a straight line along the back side of your wood. You can use the mechanism underneath the saw to adjust blade height until you get the perfect groove depth. The ideal depth will differ depending on the materials you use, but just make sure your screws can fit inside the groove. Alternatively, you can use a key router drill to create a groove in the wood.
Next, hammer two screws and drywall anchors into the wall where you plan to mount the wooden blocks. The space between the two screws should match the width of your wooden block, as seen in this
TikTok
Using a ruler or laser level can assist in making sure your blocks appear neat and aligned. Should you prefer untreated blocks, this would be an appropriate moment to apply stains or paints according to your preference. After they’ve dried completely, simply insert the blocks by sliding them together with the screws safely hidden within the channels. Lastly, arrange your mugs atop these wooden pieces and enjoy adorning your newly created focal wall.
Make Sure Your Attached Wooden Mug Display Is Secure Against Tipping Over
This initiative offers an enjoyable method to
transform your leftover timber into stylish minimalist wall decor
That also serves as storage; however, there are certain safety considerations to keep in mind. The primary issue revolves around weight limits. Plastic ribbed drywall anchors can support up to 10 pounds each pair and will work well with light materials such as balsa wood. But if you’re dealing with heavier items and worry that plastic anchors may not suffice, consider using alternative options. For added security, opt for heavy-duty Molly bolts or strap toggle anchors instead.
An additional factor to think about is placement. Given that a mug display such as this includes many components that can move around, it becomes quite simple to accidentally hit one of the wooden pieces, potentially causing your ceramics to topple over. To prevent broken pottery, make certain you position your wooden elements in an area with minimal foot traffic and at a height where they won’t be disturbed by incidental bumps.
Liked this article? Sign up for expert home advice, step-by-step DIY tutorials, and design ideas from our experts by subscribing now.
House Digest newsletter
!
Read the
Original Article from House Digest
.