Solar-powered lights offer an excellent choice for enhancing outdoor areas. They generally function by capturing sunlight, transforming it into electrical energy, which they store. Once darkness falls sufficiently, these lights automatically use their stored energy to illuminate. This feature makes them a hassle-free lighting solution since you won’t need to worry about changing batteries, checking wires, or manually turning them on or off. However, some designs might appear too simplistic or clash with your overall aesthetic. To add flair to a basic solar light and create both a stylish and practical addition to your space, consider this DIY project suggestion: Use items from Dollar Tree to convert a standard solar light into a hybrid planter and lamp stand. Customize the appearance according to your preferences. Ultimately, what emerges will be a fashionable yet useful luminary that complements your surroundings perfectly.
For this do-it-yourself project, you’ll require some unexpected supplies. Start by getting hold of
Three dark plastic broomsticks Handles
and two
round wire baskets with coating from Dollar Tree
If you already own some solar lights, then this applies to many of them.
innovative methods for transforming solar lights into attractive indoor and outdoor decoration ideas
If not, then you can obtain one.
solar-powered rod stake light available at Dollar Tree
along with some
black floral garden wire
Moreover, you will require a black wire wheel, a small wire basket, hot glue, super glue, tape, and cable ties.
Read more:
18 Clever Ideas for Reusing Empty Tic Tac Boxes in Your Home and Garden
How to Create This Homemade Lamp and Plant Stand

After gathering all your supplies, start putting together your creation. Have an assistant assist you in holding the circular piece along with the broomsticks to visualize the desired configuration. Positioning the wheel closer down will result in steeper angles for the sticks, whereas raising the wheel upward will create shallower angles and yield a smaller final product. Once satisfied with the dimensions, draw identical horizontal lines across the trio of broomstick pieces to guarantee even placement later on. Bind the wire tightly around both the stick ends and the wired circle to fasten everything securely; use additional adhesive like superglue as reinforcement. Cover the upper part of your assembled rods with tape to craft a conical outline before reinforcing this structure further with extra wiring.
Following this, delicately detach the base of the solar light and attach it to the underside of your small wire basket. Position one of the bigger wire baskets in such a way that it acts as a protective enclosure surrounding the light. To secure these components together, you may utilize zip ties, gardening wire, adhesive, or even combine all three methods. Next, finalize the structure of the light cage by linking the final wire basket back to the initial one using some gardening wire. Afterward, affix the light assembly onto the stand. Once every component has dried properly, your creation will be prepared for usage. Place a compact potted plant on the lower tier and position the setup where sufficient sunlight reaches through during the day to benefit both the plant and the solar-powered illumination system. Enjoy!
Suggestions for Personalizing and Designing This Combo Lamp and Plant Stand
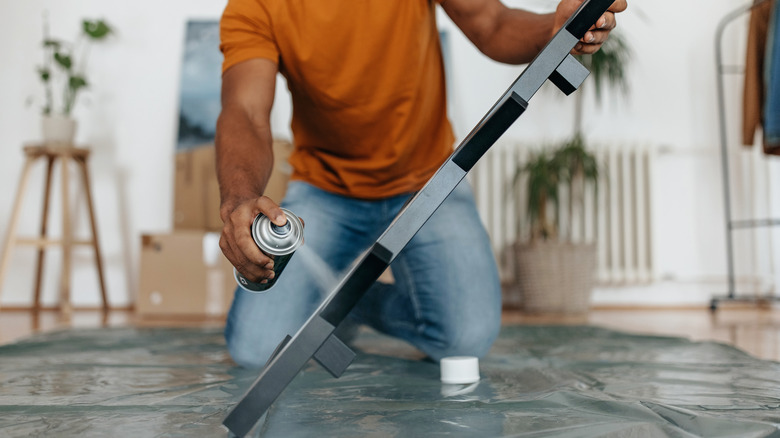
Although you could buy all components in black and assemble them as they are, numerous options exist to personalize the project according to your taste. One approach is to spray paint the entire piece so that it complements your room’s decor. Altering the materials used can significantly impact both appearance and longevity. Incorporating matching wooden broomsticks or similarly shaped timber pieces might enhance stability and lend a rugged aesthetic that would potentially increase its endurance when utilized outside. Should resilience be important to you, rest assured knowing that
Solar lights from Dollar Tree can have extended usage with just one easy adjustment.
Replacing the rechargeable batteries should be done periodically. Additionally, cleaning the solar panels gently every few months can help maintain their efficiency.
This completed project functions well indoors close to a sunny window, but it can also be placed outside with certain safeguards. Mainly, if you intend to set up this DIY creation outdoors, ensure you move it inside when the weather turns poor or chilly to safeguard it. Depending on the plant and pot used for the bottom shelf, the entire structure might remain fairly light, and you wouldn’t want strong winds or storms to knock it over. Now that you’ve begun work on your beautiful lighting feature, explore some additional options.
cost-effective outdoor patio lighting solutions that suit any design preference
to achieve the perfectly illuminated dream patio.
Liked this article? Subscribe now to receive exclusive home tips from experts, step-by-step DIY guides, and design inspirations.
House Digest newsletter
!
Read the
Original Article from House Digest
.