My time working with Hypertufa spans several years. I refer to it as play due to the boundless creativity it offers. Over the years, I’ve crafted all sorts of items from
water features
To create Buddha heads using Hypertufa. Making planters with this material serves as a great starting point, so let’s go over the process of crafting a hypertufa planter from beginning to end.
What is hypertufa?
Hypertufa is a straightforward do-it-yourself concrete blend created using Portland cement which is notably lighter compared to conventional cement mixes. This material is robust enough for outdoor use and allows for both sleek, finished appearances as well as rugged textures depending on your preference. The key factor influencing the final appearance lies within the type of mold used. For it to withstand sub-zero conditions effectively, the proportions of materials must be precise. Similar to modeling clay, Hypertufa offers versatility in design and comes at an affordable price point. This serves as an excellent starting guide into working with Portland cement and exploring what it has to offer creatively.
Select the hypertufa mold
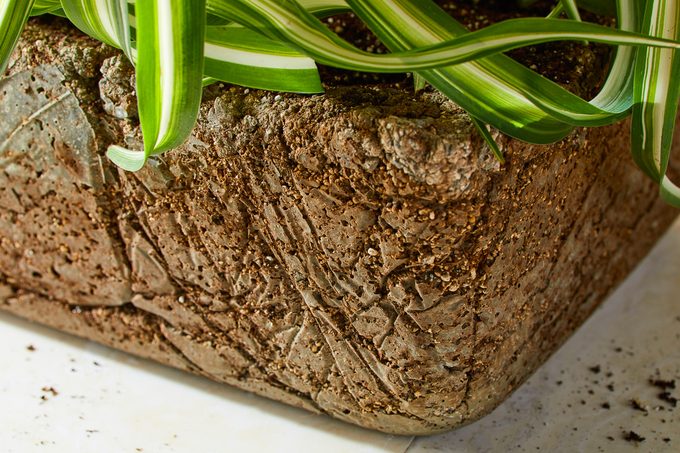
The mold used for casting your hypertufa planter will dictate its ultimate surface and texture. To achieve a sleek, glossy appearance, opt for a plastic container featuring a smooth, reflective finish. Should you prefer a more textured effect as we did, cover a plastic basin with a flexible plastic lining; let the folds and creases from this liner imprint onto the damp hypertufa mixture.
Mix the hypertufa ingredients
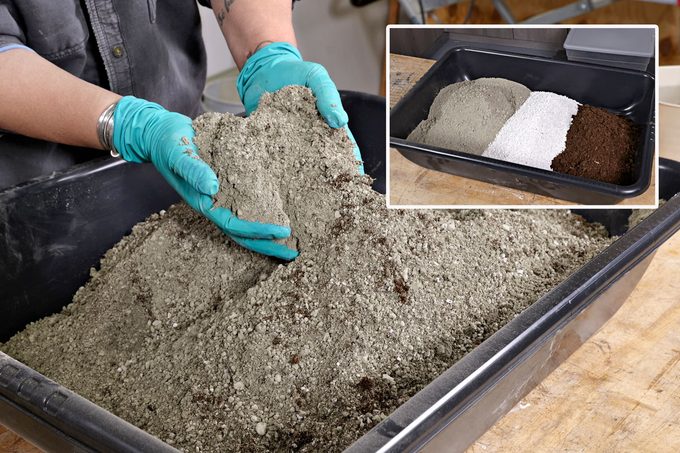
Combine the dry components: mix in two quarts of perlite, followed by two quarts of peat moss and two quarts of Portland cement. Since both the dry Portland cement and peat moss can form lumps that harden upon adding water, start by sieving these elements through a 1/2-inch steel mesh screen beforehand.
After sifting, to guarantee an even dispersion of ingredients, combine the dry components either manually or with a garden shovel to thoroughly mix them.
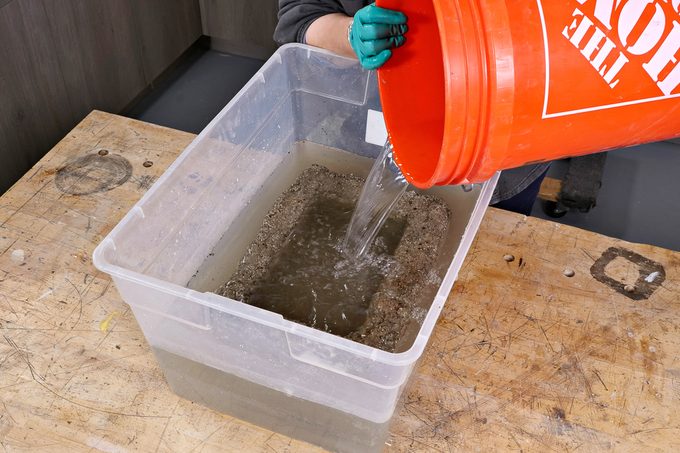
Slowly add water
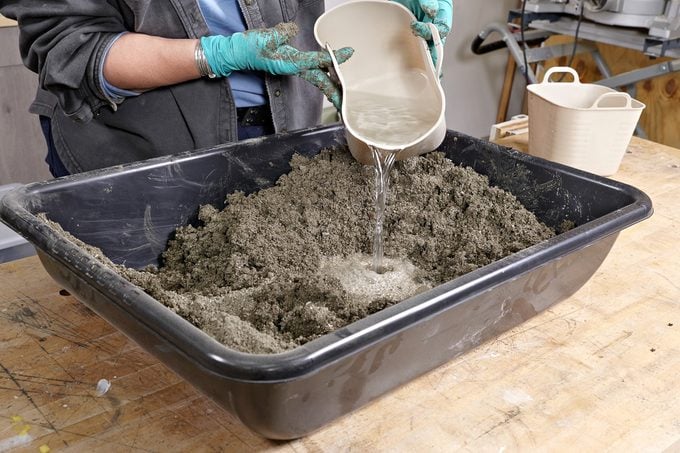
Gradually incorporate water while stirring the ingredients completely. Be cautious not to saturate the mixture excessively. Aim for a texture similar to dense brownie batter. When you can form a lump from the blend that retains its structure without crumbling apart, then you have included an appropriate quantity of water.
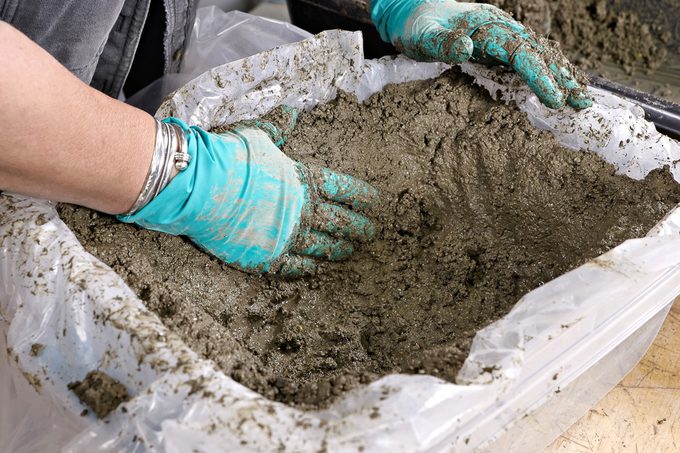
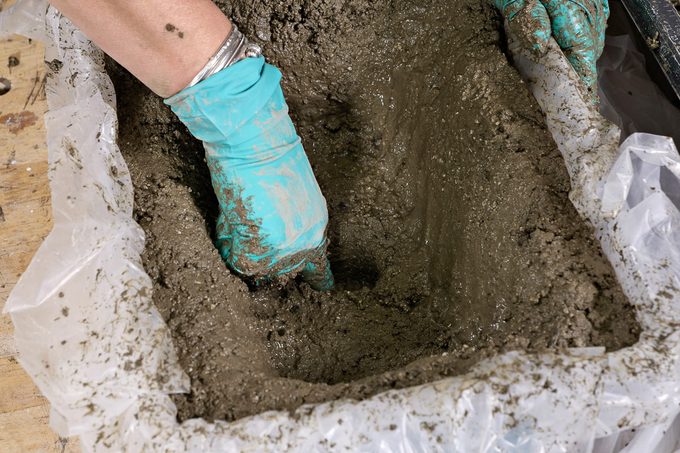
Move the Hypertufa mixture into the plastic container.
Place a pair of plastic gloves on and move the hypertufa mixture into the plastic-coated container. Begin by constructing a layer of at least one inch of hypertufa mixture at the bottom of the tub to form the foundation, then continue adding material around the edges to build up walls that are also at minimum one inch thick.
Clear out a drainage opening
Each planter requires a drainage hole to guarantee adequate water flow and avoid root rot. Use either a wooden rod or your digit to form an approximately one-inch deep hole at the base of the container. If your planter is larger, consider positioning two holes about six to nine inches apart from each other.
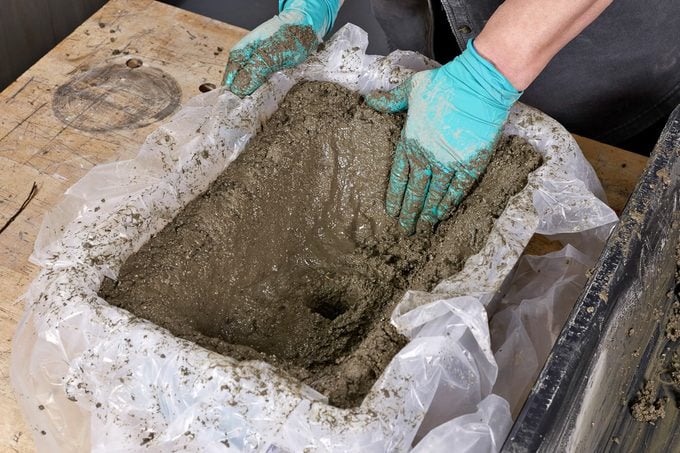
Finishing touches
This is your final chance to mold and work with the damp hypertufa mixture. The state it’s in when you finish will be permanent as it dries and cures. Ensure you smoothen the upper edge of the planter, confirm that the corners are well-defined, and check that all four walls have roughly equal thickness.
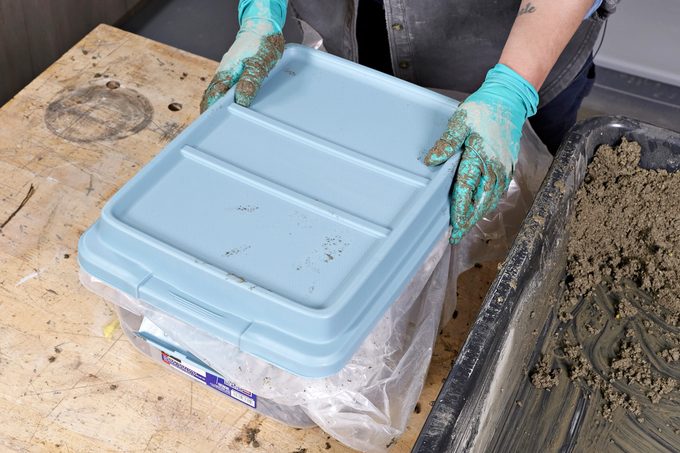
Cure for 24 hours
Place the plastic liner over the top edge of the hypertufa mixture and keep it inside the mold during the curing process for at least 24 hours. Should your plastic molding container come with a cover, utilize it as an additional measure. This covering will stop moisture from evaporating rapidly and decelerate the drying period. By doing so, you can avoid causing fissures in the hypertufa and maintain the structural integrity of the planter.
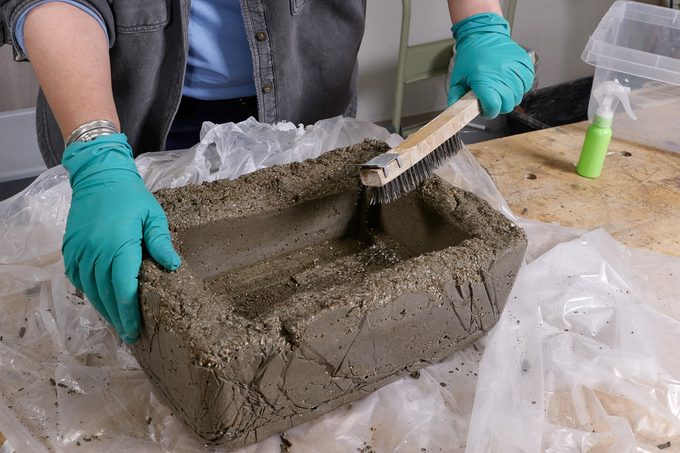
De-mold and clean up
Demolding becomes straightforward with our non-porous plastic container. However, should you opt for a porous material like wood later on, apply a lubricant such as vegetable or olive oil either by spraying or brushing it onto the mold surface.
When combining Portland cement with Perlite and
peat moss
You might notice tiny detached fragments of these materials on the exterior surface but they aren’t deeply set in. For removing such minor debris, employ a wire brush for scrubbing off those loose pieces. The primary purpose of this process isn’t so much related to enhancing the planter’s longevity as it is about achieving your preferred appearance; essentially, it caters to how you want it to look.
Complete the drying process
After demolding, the planter won’t yet be completely dry. To ensure proper drying, wrap the entire structure in plastic for about five to seven days. Each day during this period, lightly spray it with water. The piece should only be considered dry once it appears uniformly colored without any signs of dampness; you may notice patches of unevenly darkened gray areas indicating residual moisture within the Hypertufa material.
When drying, the drainage hole might get covered with a fine layer of cement. Clear it using a dowel or screwdriver prior to completing the drying stage.

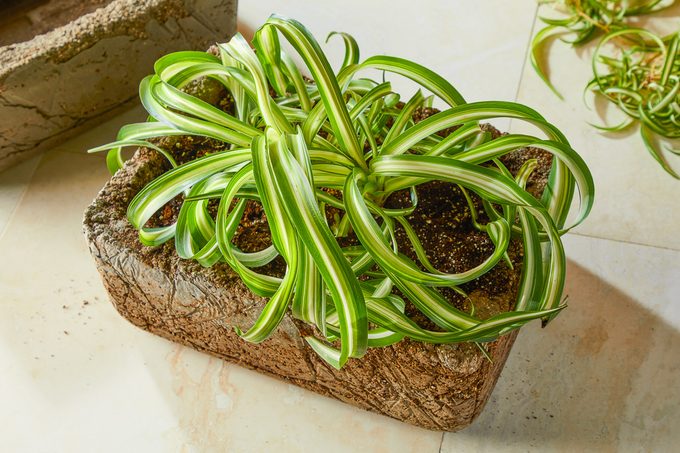
Move to a container full of water
The final step is to make sure your planter isn’t retaining any lime from the cement anymore. Lime can interfere with your
potting soil
And harm your plants. To let the lime seep away, immerse the whole planter in a container of water for seven days.
Take out the planter from the water, clean it thoroughly, then proceed with planting.
To make sure all traces of lime have been eliminated from the planter, thoroughly wash it with water before filling it with soil and planting.
FAQ
How does cement differ from concrete?
Concrete is cement
Along with an assortment of sand and gravel mixed into it to enhance durability. The cement component consists solely of Portland cement powder. When sand and gravel are incorporated, this mixture transforms into concrete.
Can you use Hypertufa with water for water features?
Certainly, Hypertufa is commonly utilized for water features and holds up well against moisture. Should your water feature encounter freezing conditions, incorporate sand into the mixture to reduce the risk of cracks forming.