Utilize the Larger Starting Strip
The end of the starter strip (where the bottom panel attaches) needs to be positioned at least an inch beneath the top of the foundation. However, installing the vinyl siding as low as possible provides greater protection for the sheathing.
rain
, snow and pests. Many providers offer two sizes of starters: 2-1/2 inches and 3-1/2 inches. It’s worth investing a little more for the wider option and beginning your siding slightly below the usual level.
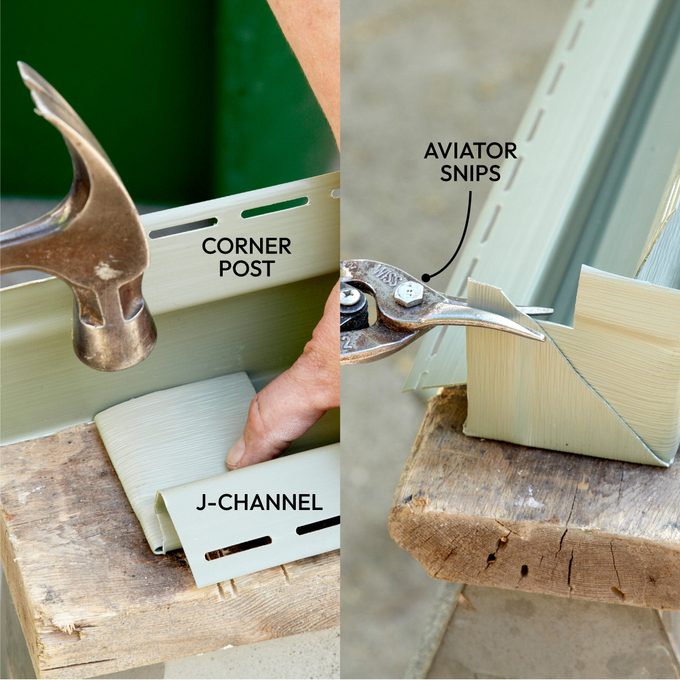
Cap the Corner Posts
Mice
, bees and all sorts of other critters love making their home inside vinyl corner posts. Keep these pests out by capping each post before you install it. Start by cutting off a few inches of the J-channel portion on the post. Fold back the remaining flaps and gently tap a crease into them with your hammer. Notch the flaps so the post will fit snugly against the wall. The posts will crack if they’re not warm, so if it’s cold outside, lay them in the sun or bring them into the house before you do this.
Lift As You Succeed
Most vinyl siding failures
happen when sections separate from one another. After this occurs, it won’t be long until the wind grabs hold of them and propels them into your neighbor’s property. Always add some slight upwards force as you work with them.
nail each piece
; this keeps the panels securely fastened tightly together. Avoid “power-lifting” each section,
Or you’ll exert too much pressure on the nailing flange, leading to it breaking.
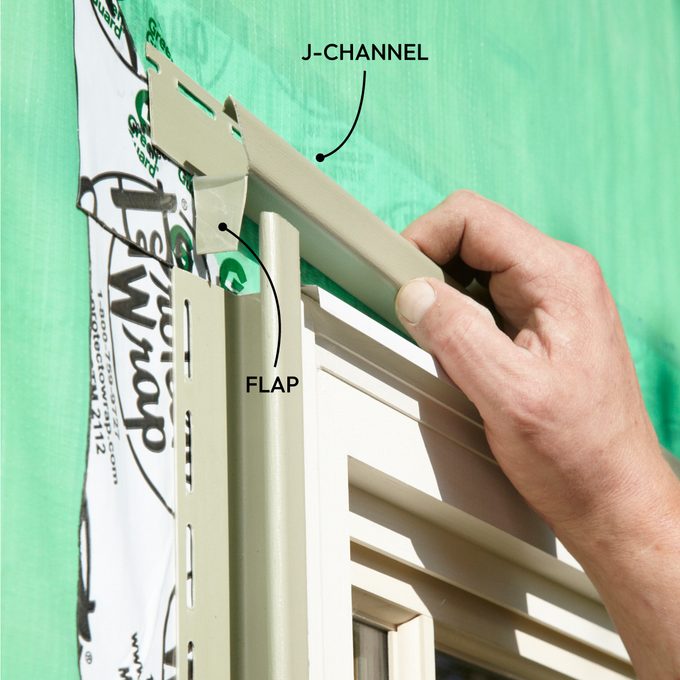
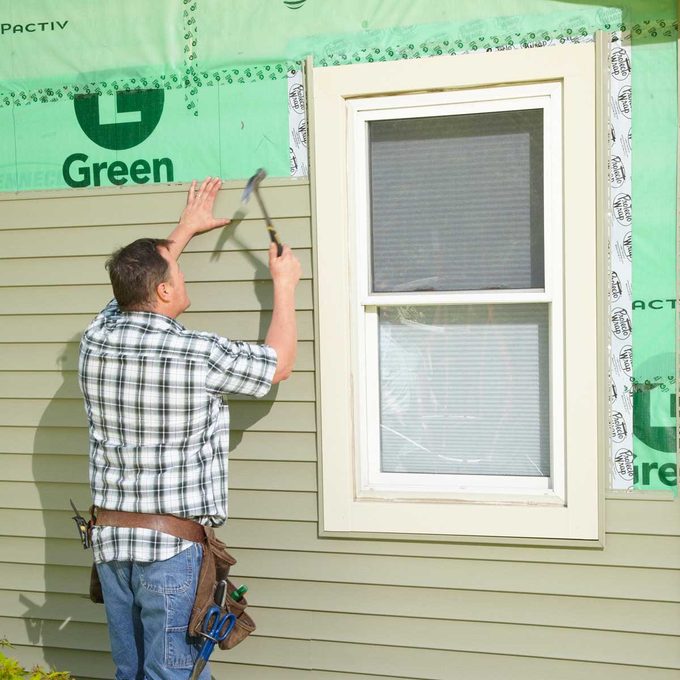
Overlap Your Top J-Channels
It’s impossible to prevent this.
rainwater
From entering through the J-channel located at the top of windows and doors. However, you can prevent water from seeping behind the side J-channels. Install a flap in the upper J-channel that overlies the sides.
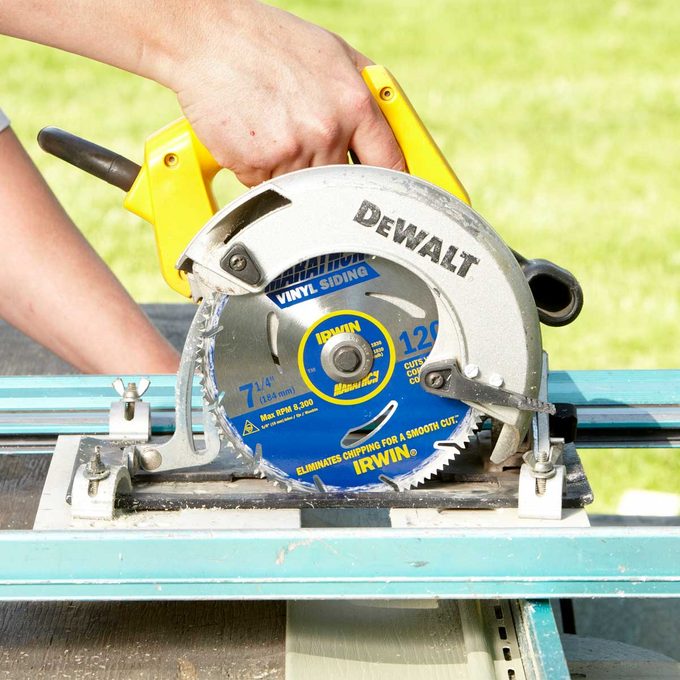
Buy a Vinyl-Siding Blade
Forcing through vinyl siding using a wooden blade
circular saw
This could lead to breakage, making it both annoying and hazardous. Purchase a blade specifically designed for cutting vinyl siding; they are inexpensive and can be found at any hardware store. Should you be utilizing a sliding miter saw and encounter continued chipping of the siding, attempt drawing the saw back more gradually through the material.
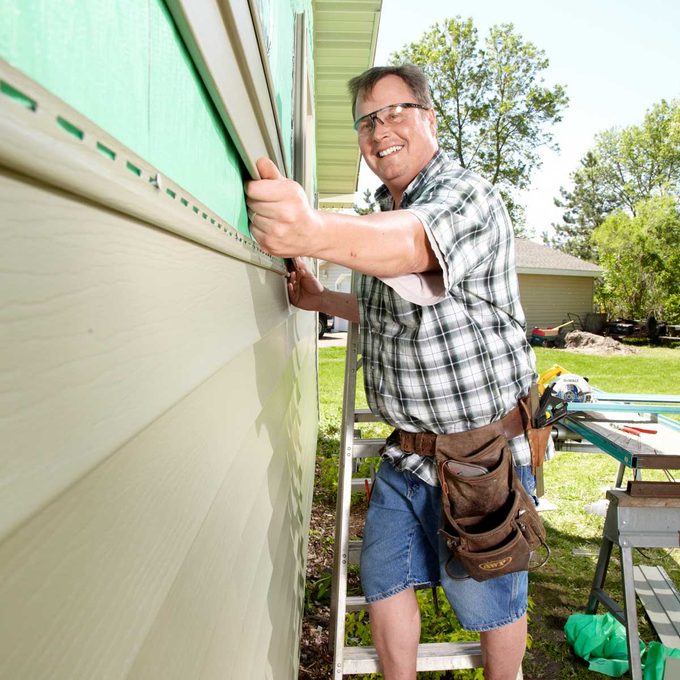
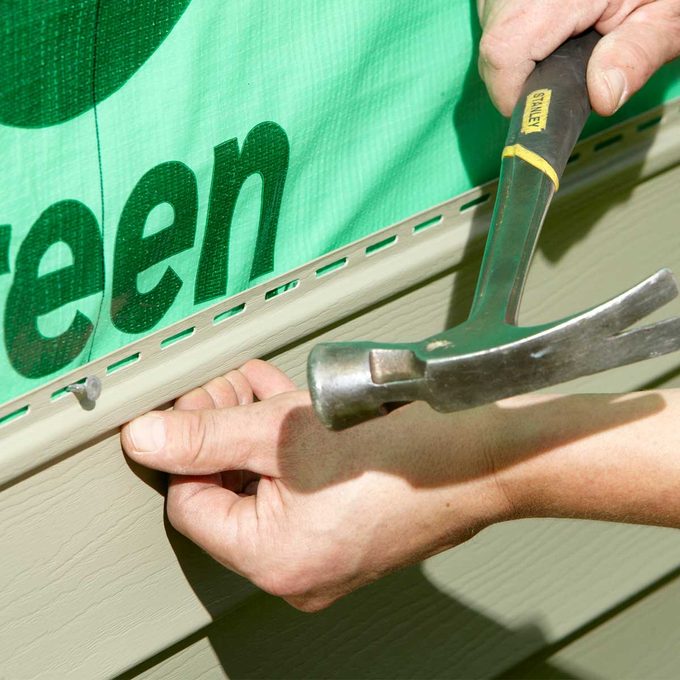
Nailing Fundamentals
Use 2-inch galvanized roofing nails for your vinyl siding unless the sheathing has foam attached; then opt for longer nails instead. Make sure not to secure them too tightly—the panels must have room to expand and contract. Otherwise, they may bulge when temperatures rise significantly.
Expansion and contraction
Some of the siding will have loose nails that are secured solely to the sheathing.
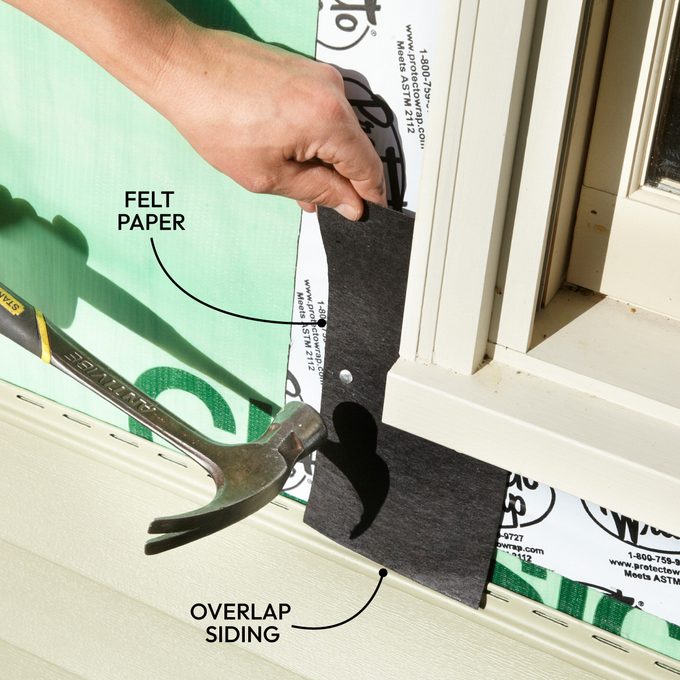
Tap the bottoms of the windows
Cut a section from the felt paper to create a strip of flashing, then place it in the lower corners at the base.
windows
Before installing the side J-channels, place the flashing over the row of siding directly beneath the window. This way, any water flowing into the J-channels will exit above the siding through the designated weep holes.
Install Longer Panels First
While putting up vinyl siding around every side of a window
door
Begin with the edge that requires the longer panels. The larger sections do not stretch as easily compared to shorter ones, making them more difficult to align if they become misaligned. Prior to securing the final few pieces on the narrower side, ensure both edges are level by measuring up to the top of the window.
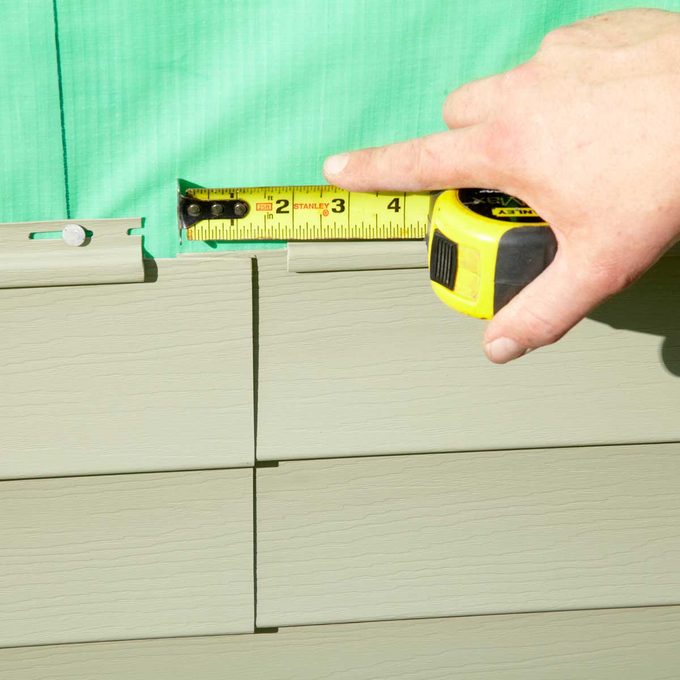
Mind the Overlaps
Always consult the specific installation manual for your chosen vinyl siding as guidelines can vary; however, typically, each panel needs to overlap by at least one inch. During warmer weather conditions, add another 3/8 inches since the material tends to shrink when temperatures drop. When applying this type of siding around the perimeter walls, initiate every new course starting from the rear corner nearest to you. This technique ensures that visible joints won’t be noticeable from street level. Conversely, aligning overlaps opposite to the direction of visibility makes these joins almost imperceptible, whereas improper alignment would make them quite conspicuous.
At both the front and rear parts of the property, ensure the seams are overlapped such that they remain inconspicuous from spaces like entryways where you frequently gather.
decks and patios
If the appearance of a seam isn’t important, install the vinyl siding such that the dominant wind direction blows across the seams rather than into them.
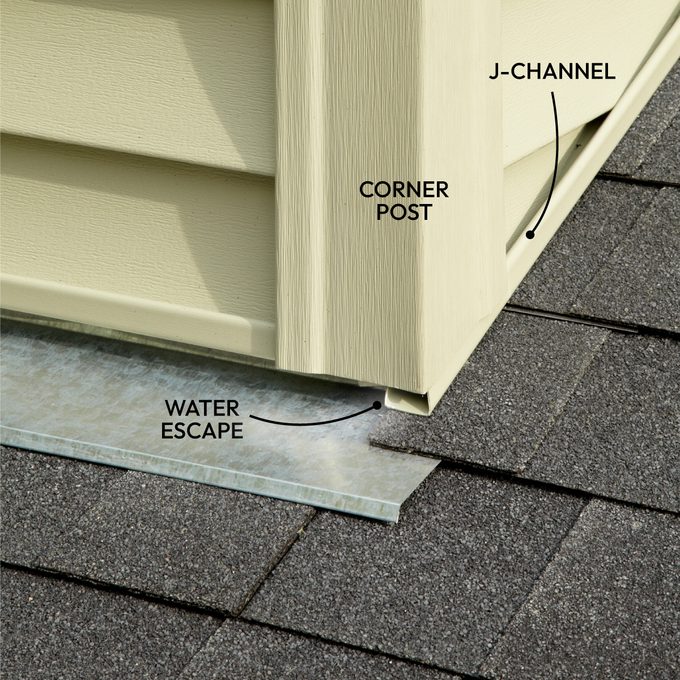
Avoid Trapping Water Behind Corners
Roof corners serve as a common area for water leakage issues. When a corner post is fitted snugly against the
shingles
And when the J-channel ends at this point, any water flowing through the J-channel could accumulate around the post and potentially seep into your home. To prevent this, raise the corner post slightly and place the J-channel under it instead.
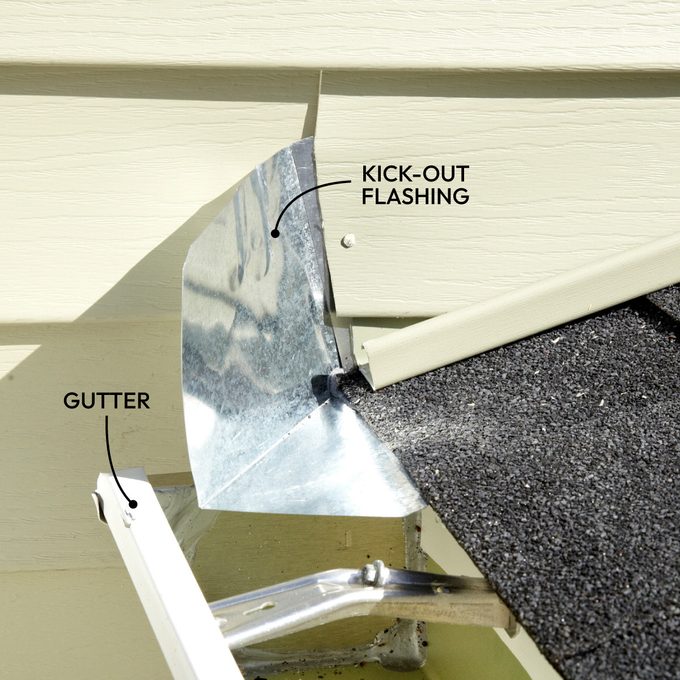
Install Kick-Out Flashing
Kick-out flashing
Stops water from flowing down the roof and getting behind the siding on the neighboring wall. While it might be troublesome to work around it during installation, omitting this could result in failing the inspection for your project. Ensure the kick-out flashing remains unsecured; place the initial siding panel beneath the flashing before securing it to the wall with nails. Overlap subsequent pieces accordingly. A tiny finishing nail might help keep the siding panels tightly together (applying some caulk over the finishing nail is advisable as well).
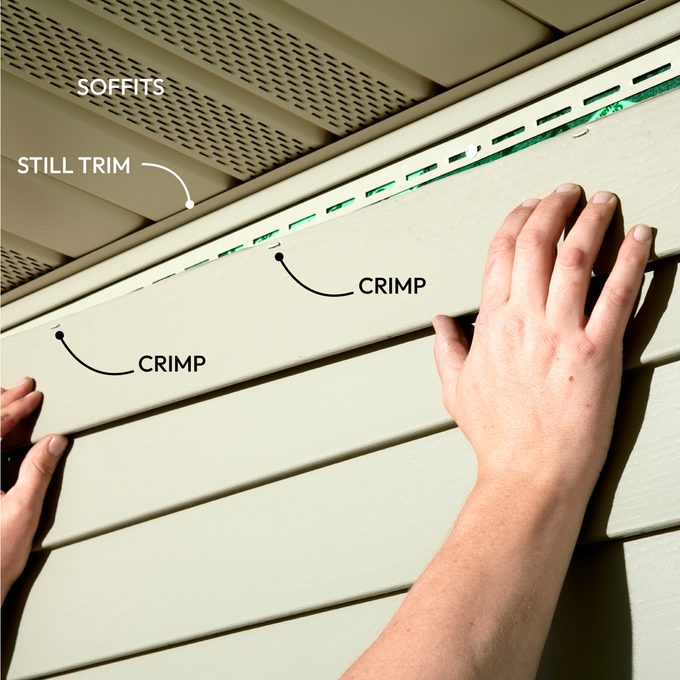
Trim and Seal the Uppermost Row
Pay careful attention to the section where the uppermost row of siding intersects with the wall.
soffits
The typical method involves fitting sill trim into the soffits, removing the upper row of siding, and creasing the siding to ensure the sill trim secures it effectively. Usually, this process suffices; however, apply additional caulk beads beneath the lower edge of the top siding row as an added precautionary measure.
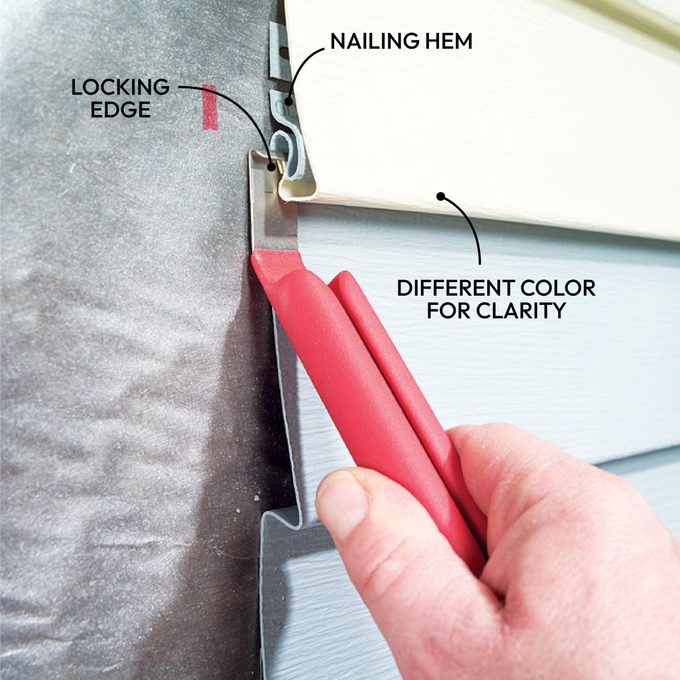
Correct Errors Using a Zip Utility
To take out a section of siding that is already fastened with nails, insert a tool underneath and lift it up.
zip tool
Below the bottom lip of the siding, catch the locking section and tug downward. Next, move the tool side-to-side parallel to the lock to disengage it. Raise the freed siding to reveal the fastening flap beneath. Prior to removing the nails, mark a guideline on the wall following the upper border of each row of siding.