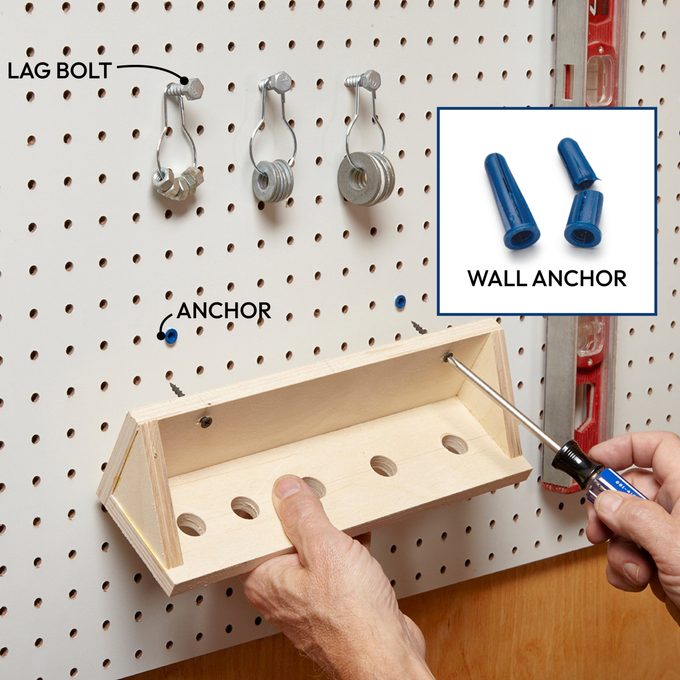
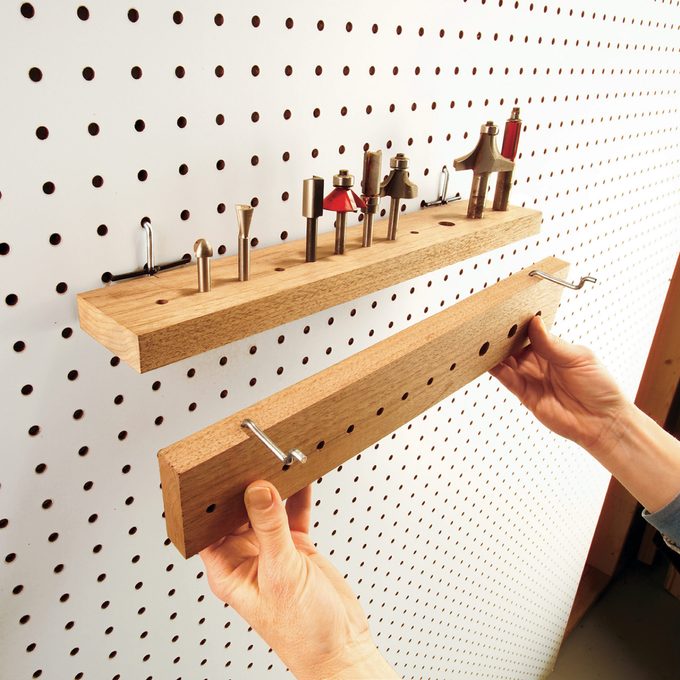
Secure the Pegboard Hooks
The top issue with pegboards is that the hooks tend to fall out whenever you take a tool off them. The fix for this problem is to secure the pegboard hooks so they remain in position.
Zip ties
Are a cost-effective and reliable option—but ensure you can reach behind your pegboard (alternatively, attach the pegs and zip ties prior to mounting the board). Pegboard hooks feature tiny barbs that secure into holes on either side of the hook for stability. Alternatively, you could apply a bit of hot-melt adhesive onto the bottom part of the peg before inserting it through the hole. This method provides sufficient adhesion to maintain the hook’s position yet allows easy removal with a gentle pull when needed.
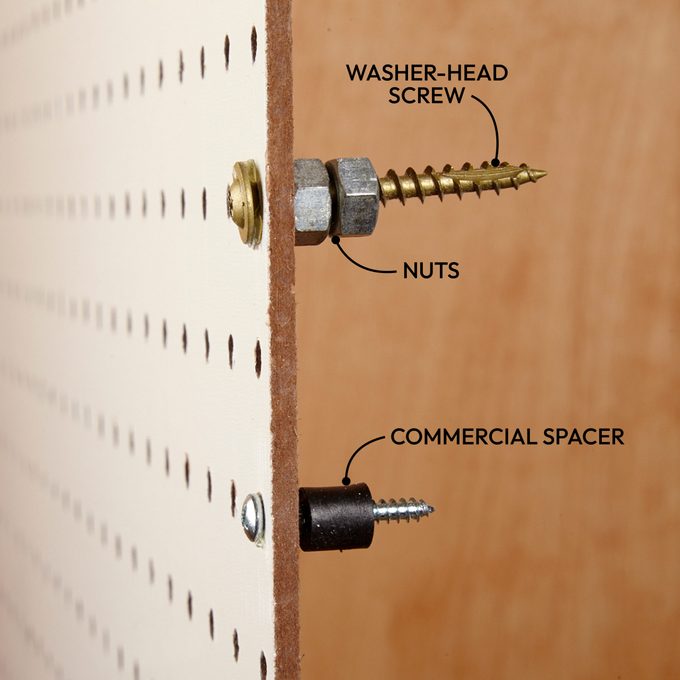
Hefty Standoffs
The pegboard requires approximately 1/2 inch of ‘space’ behind it for the hooks to fit properly. This gap is integrated into plastic and metal pegboards through the use of L-shaped flanges along their borders. However, you can establish this spacing in multiple methods as well.
-
Fit screw-in standoffs with spacers. Commercial options usually come with brief screws featuring tiny heads and flimsy plastic spacers. Create your own using sturdier washer-head screws along with nuts as spacers. For bigger panels, place standoffs at the middle point to keep distance and enhance reinforcement.
Tip:
Use
hot-melt glue
to keep these middle spacers secure prior to installing the pegboard. - Construct a frame at the rear of the panel utilizing 1x2s or 1x3s. If your panel exceeds 3 feet in width, install a 1×2 reinforcement strip across the back every 2 feet to bear the load of the tools and reduce flexibility in the panel.
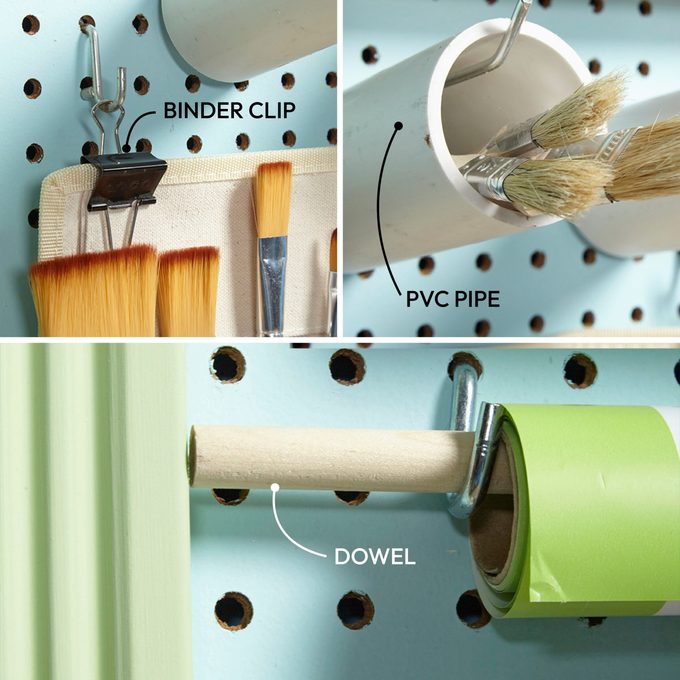
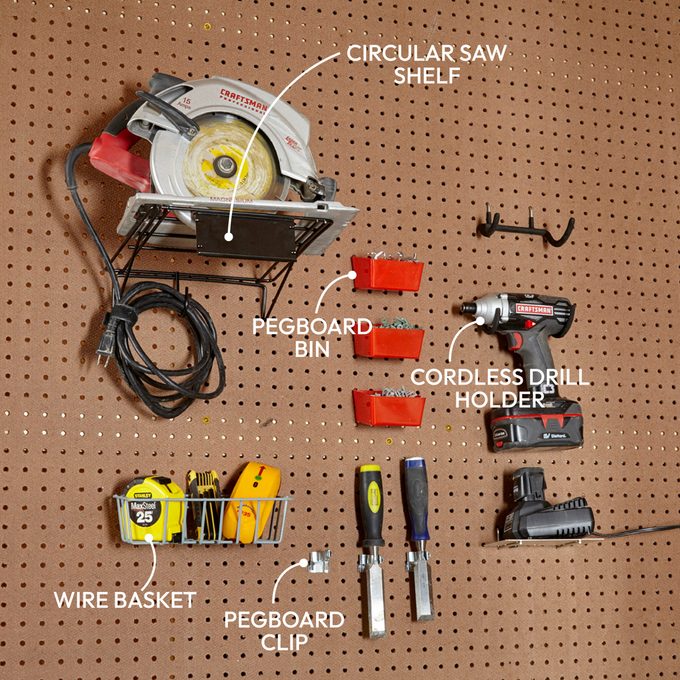
Get Pegboard Hooks to Support Additional Weight
Certain objects may not be able to hang directly from pegboard hooks. However, with some creativity, you can adapt these hooks to accommodate almost any item on your pegboard shelves. Below are three methods for installing pegboard that increases storage capacity.
- Hooks and 0.5-inch wooden dowels keep wrapping paper neatly organized—say goodbye to rummaging through messy piles of unrolling sheets.
- Binder clips secure items that cannot be hung on hooks. For instance, the clip displayed here holds a canvas tool pouch.
- A segment of PVC pipe slipped onto a lengthy hook makes an excellent storage spot for slender items such as pencils, brushes, zip ties, and more.
P.S. These stand out as the finest ones.
pegboard accessories
for an extra-organized workspace.
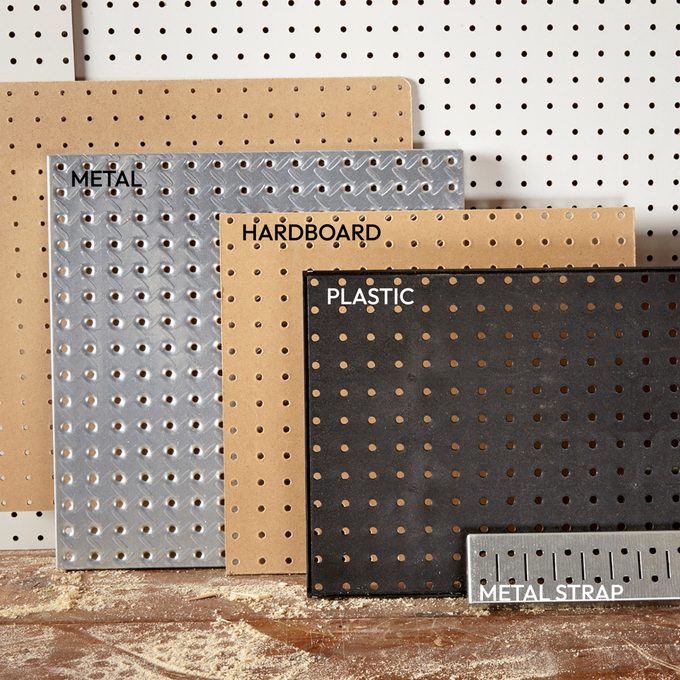
Beyond Hardboard
Many hardware stores stock primarily hardboard pegboards, however, you can discover alternative options like metal or plastic pegboards by conducting an online search using terms such as ‘metal pegboard’ or ‘plastic pegboard.’
-
Metal pegboard
features 1/4-inch diameter holes along with L-shaped edge flanges that form integrated stands. Panel dimensions typically come in increments of 16 inches and 24 inches. Made from metal, this pegboard boasts an appealing industrial aesthetic and is practically unbreakable. - Steel pegboard panels are perfect when you require a robust, singular piece of pegboard, such as in a workshop for storing extended hand implements. These panels feature 1/4-inch apertures along with integrated side lips designed for spacers, making them exceptionally durable.
- The plastic pegboard features 1/4-inch holes, bent edges to formstandoffs, and central ribs for added stiffness. Numerous systems include slide-in connectors for attachingpanels together. This board is equally robust compared to hardboardpegboards.
Go Hookless
Hang Anything
Also, check out these
shelf organization concepts to neatly arrange various items
.
Custom Shelving
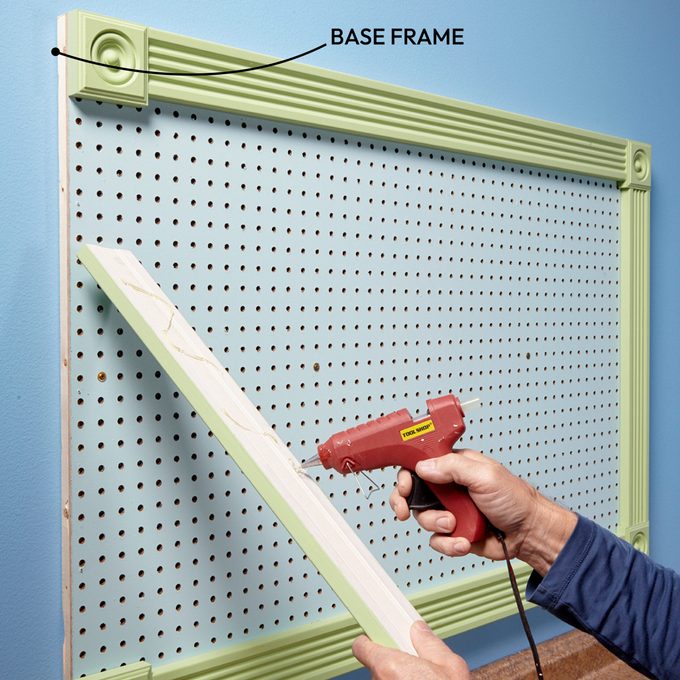
Dress It Up
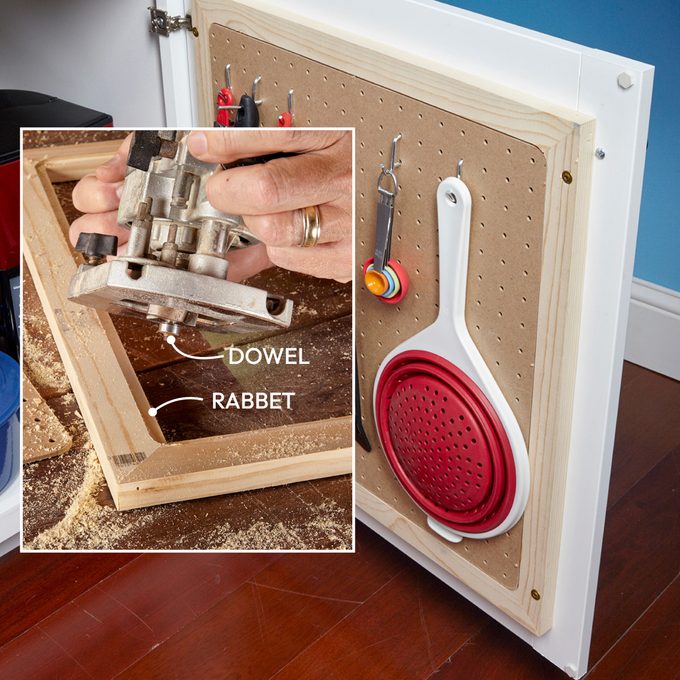
Storage Behind Closed Doors
organizing kitchens
For the laundry room and bathroom cabinets, use a rabbet bit to cut a channel into a 1×2 frame. Secure the pegboard using adhesive and finish nails, then affix it to the door. This frame reinforces the sides of the pegboard and provides a half-inch gap at the rear for inserting hooks easily.

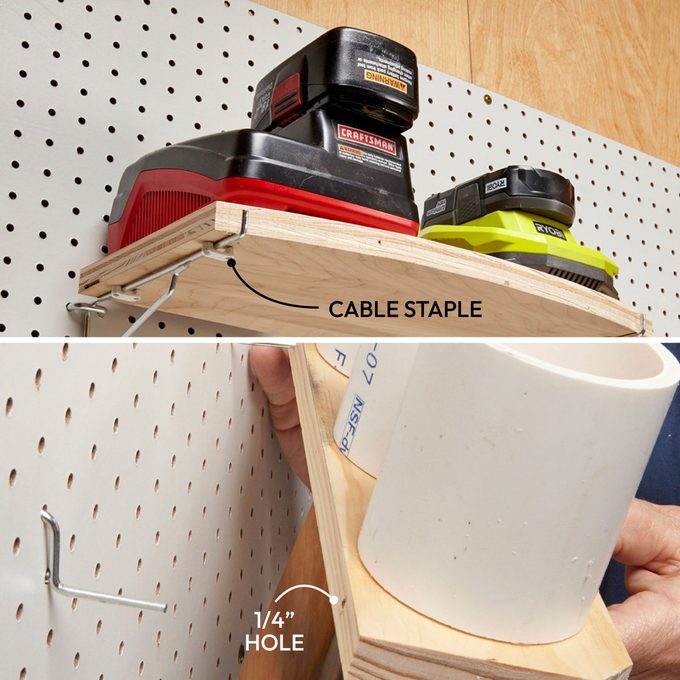
Pegboard Cubbyholes
-in.-dia
Pipes function effectively for most objects) and can be slid onto pegboard hooks. Afterward, fill them with files, hacksaw blades, zip ties, pencils, stirring sticks…you know the drill.
Pegboard Shelves
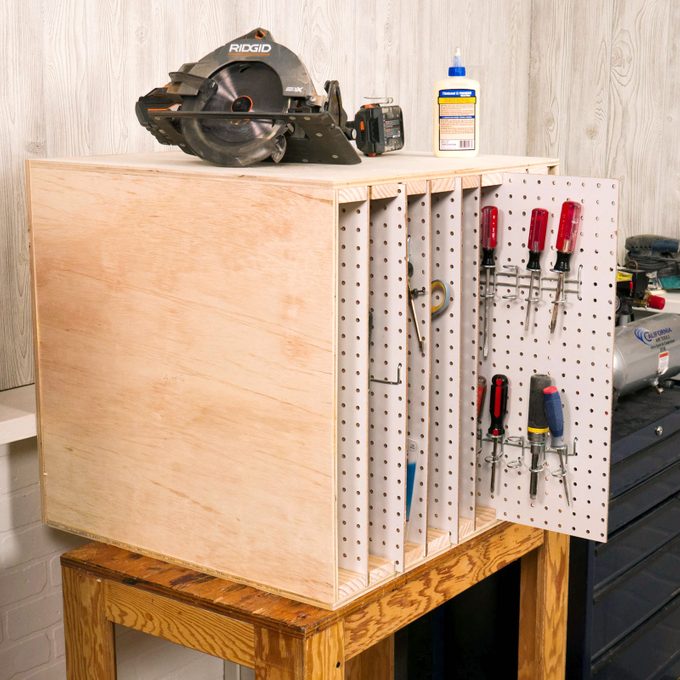
Pegboard Sliding Shelves
For the most part, we only use pegboard in one way: by tacking it to a wall and having one of the sides available for hanging up tools. Plus, this design is completely flexible and can be sized to fit your needs.