If you’re seeking an enjoyable and fulfilling weekend activity, consider building a vertical garden. These gardens appear both modern and chic, plus they offer a practical way to maximize space when gardening.
houseplant
s into small spaces.
Although vertical gardening is a widely adopted method for conserving space in
vegetable gardening
In this piece, we’ll mainly concentrate on ornamental vertical gardens designed for indoors or compact outdoor areas. No matter if you reside in an apartment with a tiny balcony, own a modest patio, or aim to install a vertical garden within your living space, these suggestions will offer ample inspiration.
undefined
1. Wall Tile Planters
To install this setup, simply prepare the surface below for mounting and secure these tiles onto it. These tiles serve both a practical purpose and act as a sculptural feature on your wall. This offers an automated enhancement over a standard painted wall or backdrop.
photo display
into a vibrant, ever-evolving masterpiece.
Things to Note
- Make certain you accurately measure your area. As these tiles are pre-manufactured, some may be trimmed to fit, whereas others cannot due to their construction materials.
- If cutting the tile doesn’t appeal to you or if it’s larger than needed for your space, consider incorporating a tall, ornamental feature or a slender tree or plant instead.
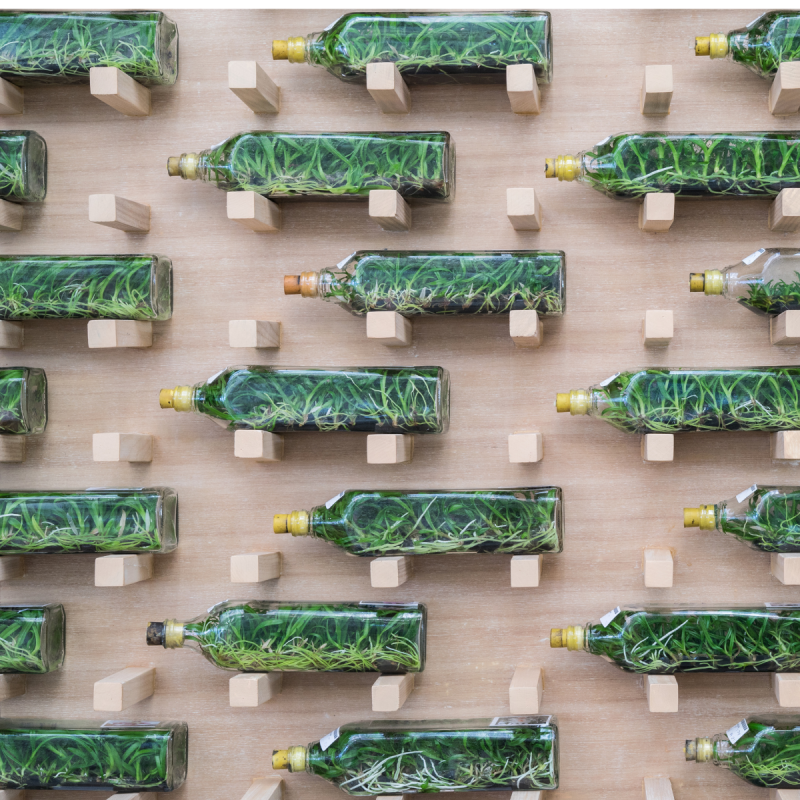
2. Wall of Bottles
The bottle wall installation stands out as a lively and engaging vertical garden exhibit. Its geometric design grabs attention, particularly because it isn’t two-dimensional. Utilizing bottles for these creations gives them a three-dimensional appearance while still keeping a polished and modern aesthetic.
To construct such a wall, you would require:
- Marine plywood
- Water seal
- Brush
- Wood screws
- Lumber (2″ x 2″)
Things to Note
- You should decide on the area of the wall you wish to cover, which will help you calculate the number of bottles required to achieve this effect.
- Ensure that the rear support or the structure is installed securely.
- Coat the plywood surface with a layer of water sealer. I recommend using Thompson’s WaterSeal, available at all home improvement stores. Although this product may not entirely block the wood pores, it provides protection against moisture and stops water from soaking into the wood. Consider applying this treatment if you plan to use the display outside.
- This design will make a strong impression provided that all the 2″ x 2″ timber pieces are evenly spaced and aligned precisely in a straight line. Even slight deviations of a couple of centimeters can become immediately noticeable. Therefore, take great care when marking the locations for attaching the lumber or bottle supports with screws.
- Below are several types of flora that can thrive within bottle confines: croton, polka-dot plant, Southern maidenhair fern, prayer plant, club moss, and ti plant.
3. Steel Planter Stand
Assembling a DIY metal pot rack for your plants may demand additional effort, particularly if you’re constructing it entirely from the ground up; welding might also be necessary. However, when executed properly, this project can provide a durable and lasting way to display your container gardens.
It boasts a sleek and minimalistic design as well. Depending on their size and placement, some of these metal pots for plants can serve as independent decorative elements.
Note:
It can also be attached by screwing it into its base.
As this is a transparent setup, ensure the wall behind it is aesthetically pleasing.
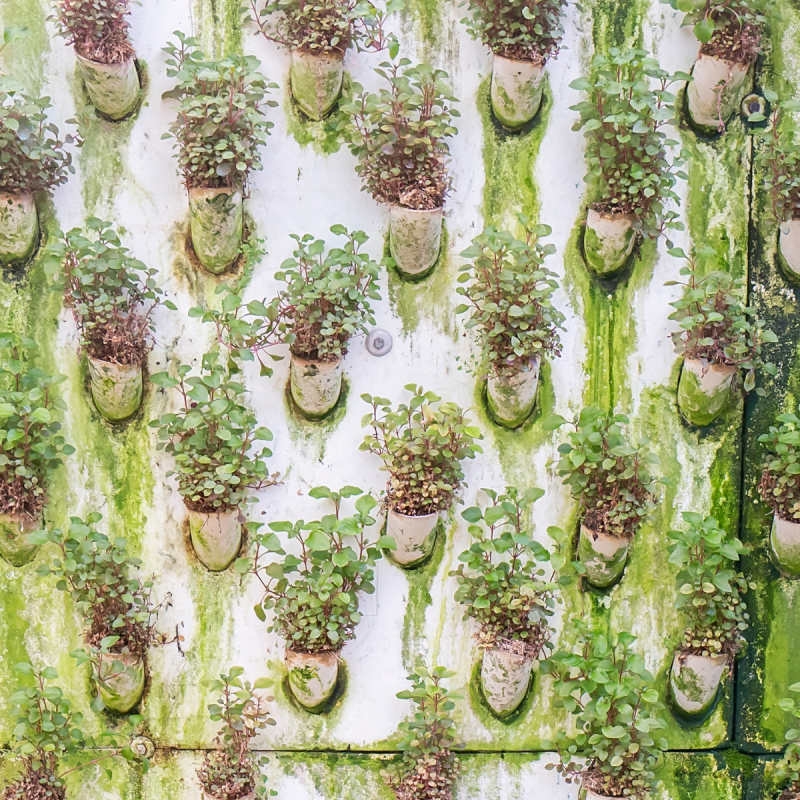
4. Pipe Wall Planter
To achieve this appearance without constructing a concrete wall, consider building this feature using plywood along with elbow pipes.
paint
It would involve some fake moss or algae painting to achieve an aged appearance.
Things to Note
- Similar to the bottle wall, you must measure the space where you’ll install this piece. Instead of attaching 2″ x 2″ wood, you’ll be fitting elbow pipes into place.
- Following this step, you should paint the wall white and create the appearance of moss or algae. Ensure that the green paint is added onto the pipe surfaces, particularly near their bases.
- To enhance the look, you can drizzle some paint starting from the bottom of the elbow pipe and let it run down.
- Using some creativity, you can craft a wall that appears aged and seems as though your plants have been thriving there for quite some time now.
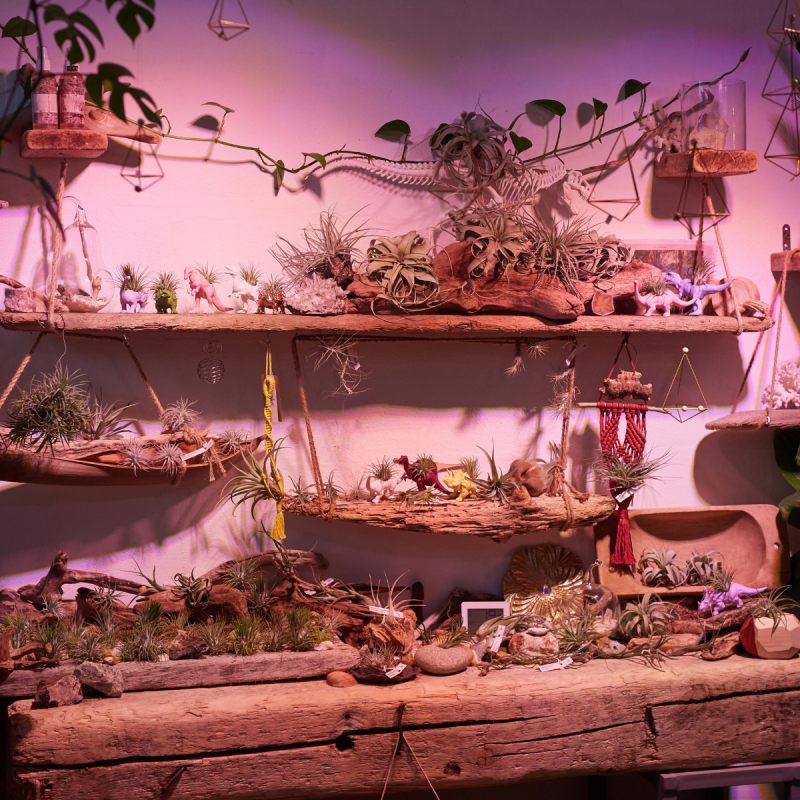
5. Driftwood Wall
This wall installation is ideal for small indoor areas, and I recommend cultivating
succulents
,
cacti
, or other houseplants.
Things to Note
- After acquiring several pieces of driftwood, position them similar to shelves and secure them using plenty of support structures.
- Ensure that the driftwood includes various sizes to lend the entire arrangement a more natural and organic look.
- Include some accessories to finish off the outfit.
undefined
6. The Timeless Trellis Design
This could be the most typical type of wall decor and plant holder. This sort of
trellis
It can be purchased pre-assembled. Simply mount it on your wall and buy some plastic hanging pots.
The best part about these pots is their versatility; you can organize them into various designs, plus they’re simple to take out if you have to repot them.
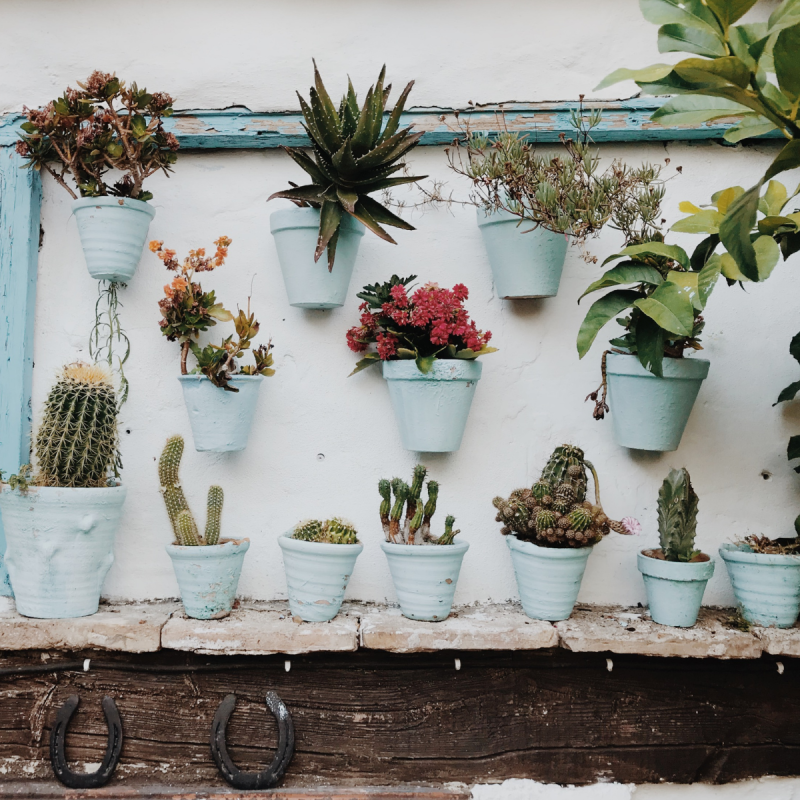
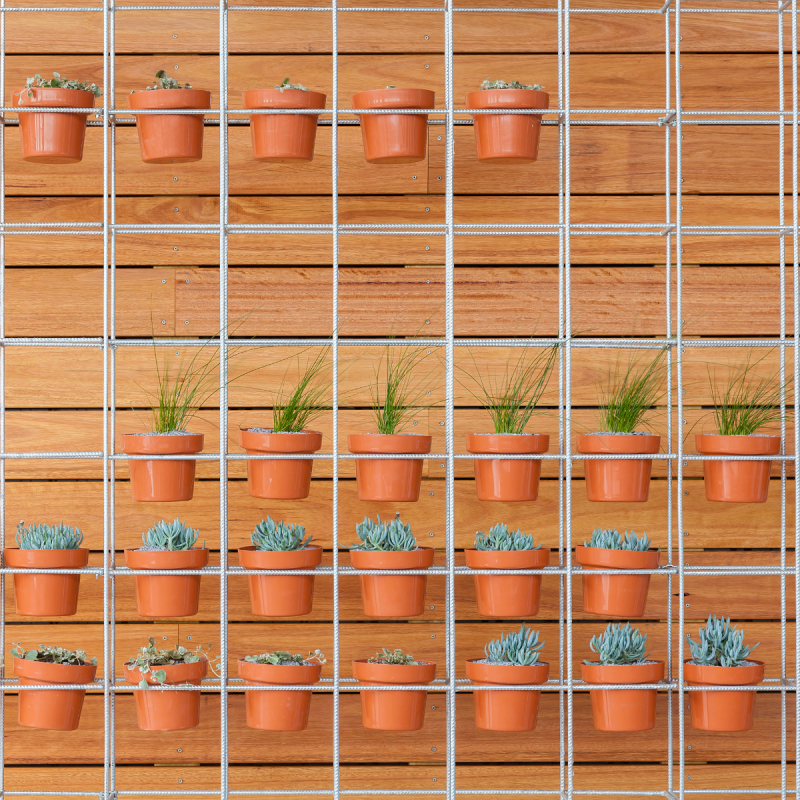
7. Shabby Chic
For a
cottage garden
Sure, get some terracotta pots and paint them the same color. Afterward, attach a few of these pots to the wall and build a wooden frame around them.
This somewhat rustic yet elegant aesthetic is a type of decor that nearly everybody seems to admire.
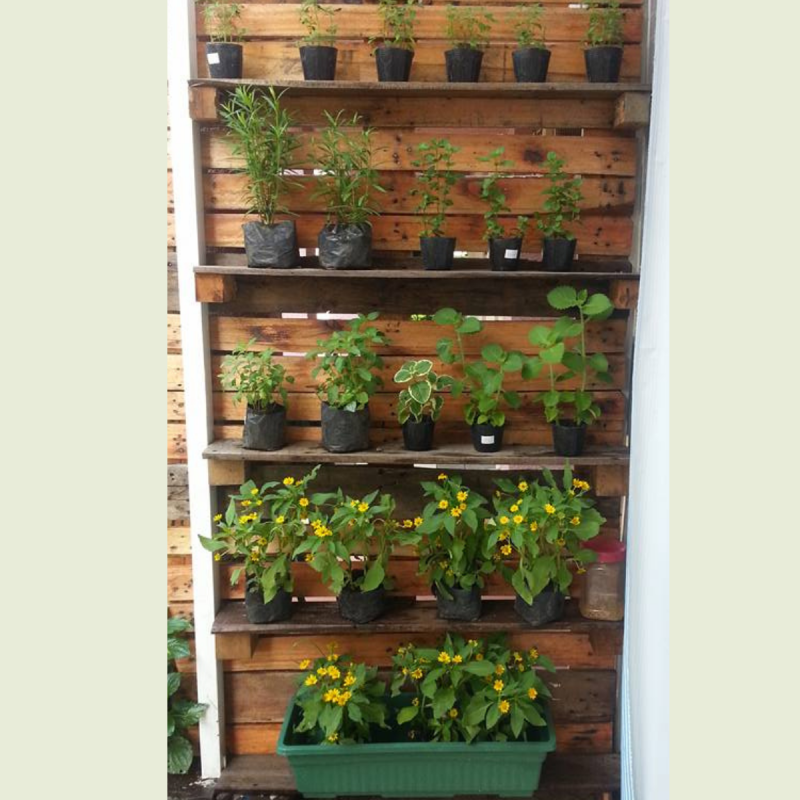
8. Pallet Wall
You can utilize an old wooden pallet for this.
recycled planter project
It’s straightforward, and you can effortlessly adjust the precise height you wish to achieve.
This shelving unit is ideal for displaying succulents, herbs, or small potted plants. Additionally, it has an aged appearance that lends itself well to a rustic aesthetic.
9. Design an Easy Vertical Garden Using Air Plants
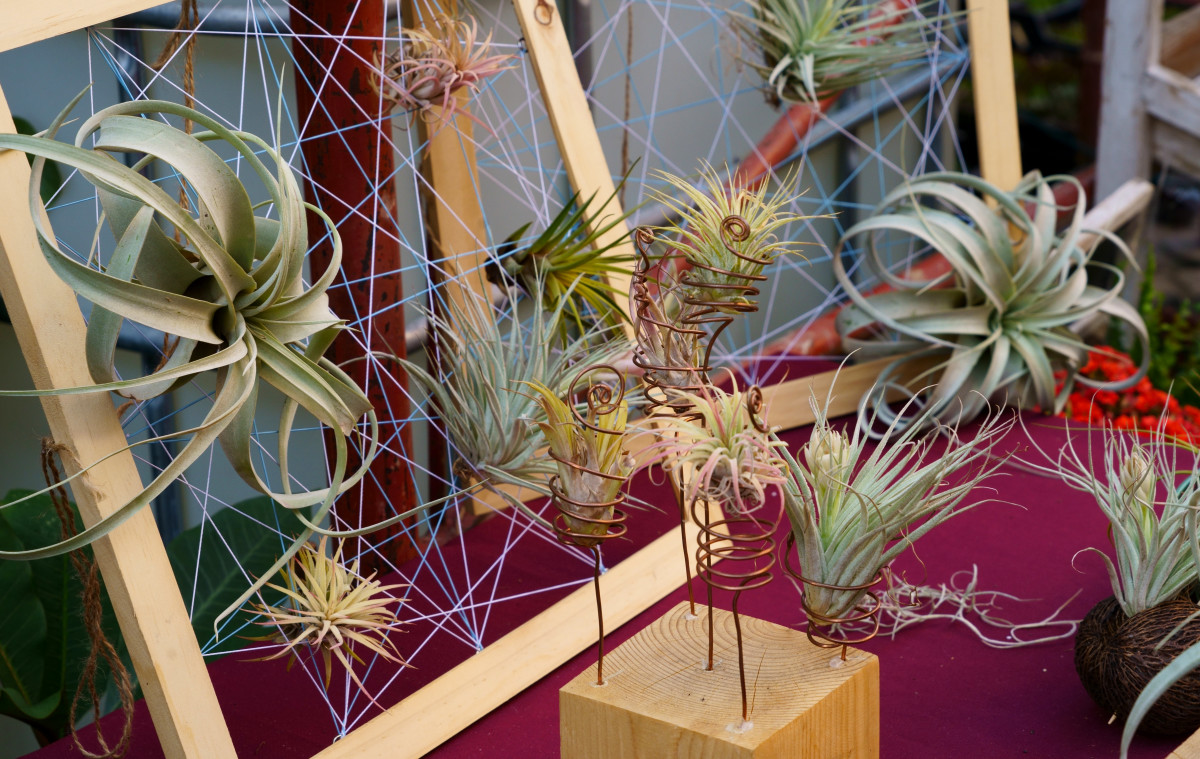
This concept works well if you have limited funds or prefer not to engage in extensive hands-on projects. You only require a fundamental wooden structure along with some sturdy string, or alternatively, a timber piece paired with robust copper wire. Essentially, all you’ll need to perform are straightforward tasks like drilling or hammering nails. Copper wire, readily available at most home improvement outlets, can easily be coiled into rudimentary mounts for your tillandsia. Should you opt to attach them using threads within an outlined frame, consider positioning this frame leaning against a wall or hanging from above.
The delightful aspect of air plants is that they need neither soil nor much upkeep, merely an occasional spritzing.
low-maintenance
and super cute.
10. Combine Different Planters in Terms of Size and Material

A vertical garden doesn’t have to follow strict geometrical or symmetrical designs. For those who prefer an effortless, whimsical appearance, consider attaching various-sized, differently-shaped planters made from diverse materials directly onto a colored wall within your garden or greenhouse. Ensure these containers remain securely fastened with the use of mounted metal wire brackets, which can typically be found at local gardening stores.
11. Depend on Vining Plants
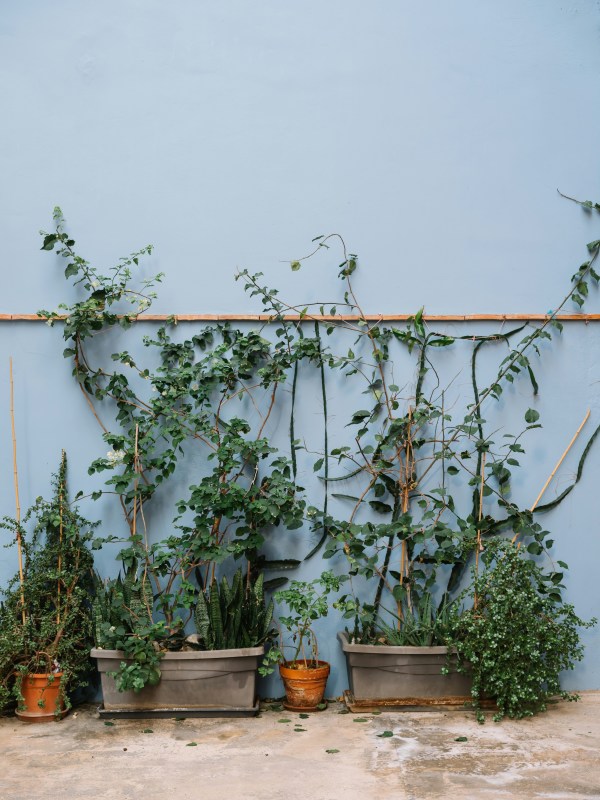
Expanding a vertical garden becomes significantly simpler when your plants have an inherent tendency to grow upward! Opt for species that climb or vine naturally, such as
jasmine
Plants like honeysuckle or passionflower can bring a sense of wilderness and spontaneity to your vertical garden. To ensure their growth, you should provide supports such as stakes, wooden boards, or let them climb up a brightly painted wall for an appealing juxtaposition.
Vertical gardens offer a simple, budget-friendly, and organic method to beautify any area, be it a compact living room, a balcony, or a petite outdoor spot. Do not let the constraint of limited space deter you from enjoying the pleasure of cultivating plants and blossoms. Let these concepts motivate you to initiate your very own vertical garden right away.
READ THE COMMENTS